
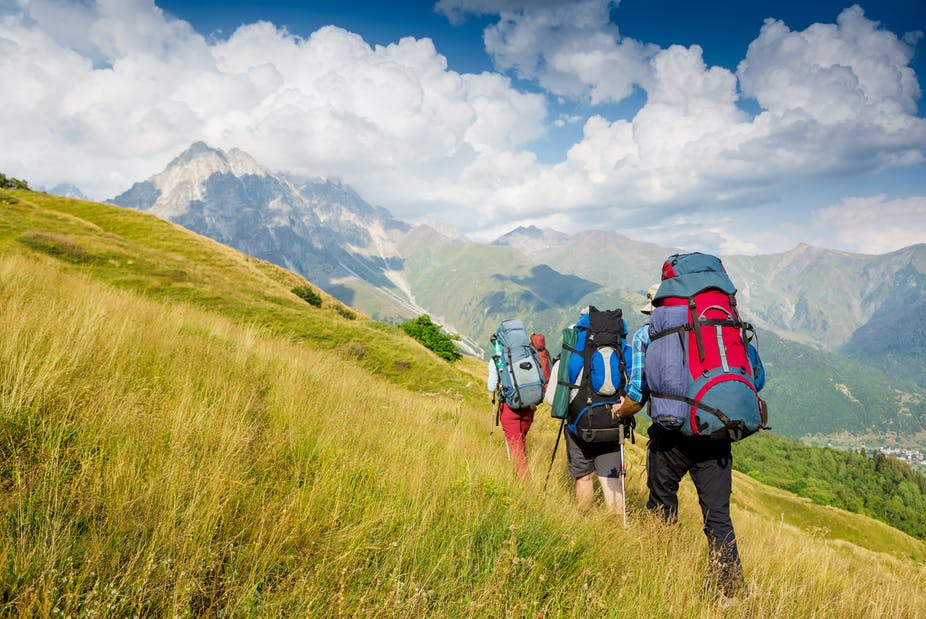
Maroon bells-Snomass Wilderness in Aspen is the perfect place for you to go on a hike. This little parcel of alpine terrain lies only 10 miles from Aspen. Most of the trails are easy to complete, with some of them starting at 8,300 feet and quickly ascending. This area offers many hiking opportunities, and it is accessible year-round.
Maroon Bells hikes demand solid footwear due to their elevation. Winter months are colder than summer, so the road closes in mid-November and reopens in mid-May. Snowmobile tours of the mountain ranges can be arranged if you visit the area in these months. To get to the Maroon Lake trailhead, drive 6 miles one way. Consider hiring a babysitter if you have kids or going on a winter hike.
Maroon Bells is home to the Scenic Loop Trail, which offers breathtaking views of mountains and wildflowers. This lollipop-shaped trail begins with a straightaway and ends with a loop. Start your journey at west end of lake. You will cross another footbridge so that you can continue on the loop. Afterwards, continue hiking around the perimeter of the lake and return to the parking area.
Three campgrounds can be found in the area. One of them is located near the Maroon Lake trail. The second is located 3.7 mi from the main trailhead, and provides easier access. This trail is scenic but it can be hard to see maroon bells from far. You may even encounter moose. Tourists love to hike in Maroon Bells despite its beauty. Although the Forest Service attempts to manage this popularity, it's important to remember that camping at higher elevations remains prohibited.
Maroon Bells Trail is one of the most popular. The Maroon Bells Trail is a 1.8-mile long trail that offers spectacular views and is relatively flat. It is popular for backpackers and other hikers, and is suitable for people with various physical abilities. While it's not as difficult as the other, it is not wheelchair-accessible. It's not the only trail in the region, but it's one of the most popular.
There are many other trails that you can take in Maroon Bells. The Scenic Loop Trail provides stunning scenery for three miles. The scenic loop route is the easiest and shortest, so it's a good idea to drive into the area before you begin your trip. You can also find Crater lake on a few trails around the area.
Acclimatization is key when hiking in Maroon Bells. It's a good idea not to leave the Welcome Station until the morning. This will give you enough time to adjust to your new elevation before you set out on your hike. You'll be able to enjoy the breathtaking views once you feel comfortable at higher elevations. There are several other hiking options in Maroon Bells, too.
FAQ
Where can I store my survival gear
It is a good idea to keep your survival gear close by, so it is easy to access in an emergency. It is easiest to keep your supplies under your mattress or in a closet.
Make sure you label your supplies with the contents and date, so you know which ones you've used and which are still good.
Also, keep a copy of your inventory somewhere else too. If something happens to your house or apartment, you'll need proof that you had the right stuff.
How many days' worth of supplies should you have?
Ideally, you would like to have three months' worth of supplies stored away. This would mean that you need enough food, water, and other necessities for three months.
However, this number varies depending on the severity of the emergency. It is possible that you don't have any neighbors in an area where you can get help. Perhaps there isn't a power grid.
In such cases, it is a good idea to prepare for a more long-term situation.
How long can the survival kit supplies last?
The best way to make sure you have enough supplies in case of emergency is to always have them available. When disaster strikes, you don't want your supplies to run out.
For camping trips, for instance, it is important to have everything in one backpack. This includes food, water, first aid kits, fire starters, matches, tools, and other items you may need during an emergency.
Additionally, you should have a flashlight and map, compass, whistle, as well as other useful items. These items will help you stay safe and find your way home if you end up lost.
These supplies should be kept in a waterproof container, such as a bag, box, bucket, or plastic bag. Make sure they are easy to access and won't roll around inside your backpack while you're hiking.
Consider the things you'll be using most often, and how much space each one takes up when packing. If you have room left over, consider adding extra items. You could, for example, add a stove to your shopping list if you intend on cooking outdoors a lot.
It is important to keep track of where you have placed your supplies. You will be limited in the things you can do once civilization has returned.
How do you prepare your house for war?
Make sure you close all windows. Place everything you own in storage. You'll need to have enough food and water stored away as well.
You should also have an evacuation plan worked out. You must immediately evacuate if you think your home might be attacked by hostile forces.
If you do, then you might end up dead.
What should you keep in your bug-out bag?
The Bug Out Bag (BOB), is a kit that can help you survive for 72 hours without food, water or shelter. It contains a first-aid kit, flashlight and whistle, as well as a knife, matches. Also included are a rope, handkerchiefs, toilet paper, toilet paper, hygiene products, sunscreen, sunglasses, socks and gloves.
Remember that you'll probably only use half the items in your BOB. Make wise choices.
How do I doomsday planning on a budget
It is not easy to prepare yourself for an apocalypse. But if you have to, then here are three ways to make sure you're ready.
-
Be sure to have enough food, water, and other essentials. You don't want to be caught without any supplies when disaster strikes.
-
Buy a solar-powered radio. You will be informed of what's happening around the world even if there is a power cut.
-
Learn how you can grow your own food. This will allow you to know exactly what foods you should eat. You won't worry about running out of food.
Statistics
- Some 57.2 percent of voters chose Crocs, proving that comfort rules. Background: This summer, we surveyed our readers about what they’d shove into a backpack if they were caught unprepared for the collapse of society. (inverse.com)
- Receiving 11.2 percent of votes in our reader survey was a propane torch. Background: This summer, we surveyed our readers about what they’d shove into a backpack if they were caught unprepared for the collapse of society. (inverse.com)
- A survey commissioned by National Geographic found that forty percent of Americans believed that stocking up on supplies or building a bomb shelter was a wiser investment than a 401(k). (newyorker.com)
External Links
How To
How to keep food alive in a survival situation
Drying food is the best way to preserve it in an emergency situation. Drying foods makes them last for longer and removes moisture. It also decreases the risk of bacteria growth.
Because dried fruits don't require much preparation, they are great for snacking in an emergency. Dried fruits are easy to transport and can be eaten as much as you like without worrying about weight gain.
It is possible to dry fruit at-home using a drying rack, but a solar oven would be more practical. You can dry almost any food with a solar oven, including meat, fish and vegetables.
Food preservation is best done by making sure it is airtight. This stops oxygen from entering the container, which can cause food to spoil. Preservatives are not necessary if the container is tightly sealed.
If you do decide to add preservatives, try adding salt first. Salt helps prevent mold growth. Then follow this with vinegar. Vinegar is a good way to kill harmful bacteria and stop mold growth.
To begin, you will need to chop up your food into small bits. You can use scissors or a knife. Pack everything carefully so there is no air in the container
Place the food in a plastic bag. Place the food inside a plastic bag. Keep it warm until it dries fully.
Once the food has dried, you can place it in a sealed bag. Be careful not to let anything touch the food.